Owners of any vehicle must have been more than familiar with brakes, whose main goal is to cut off the vehicle’s speed and lead it to a kool stop without a disastrous tire blow-out. It is impossible to imagine a bicycle without brakes!
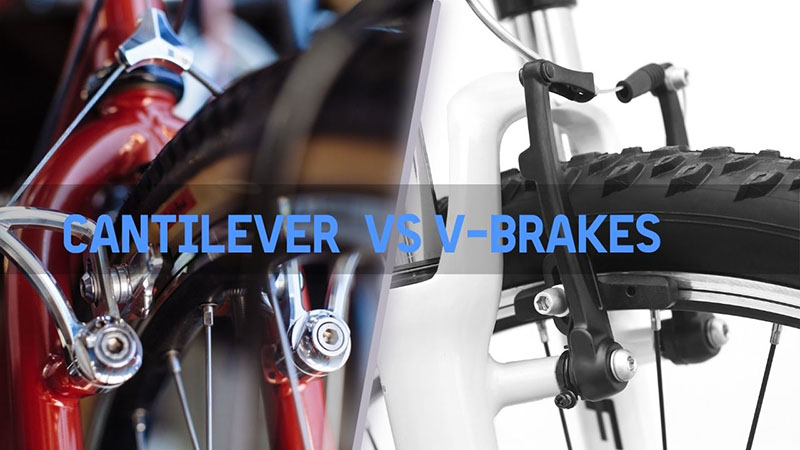
Among numerous brake types, rim brakes are among the most popular. And it continues to be divided into two sub-categories: V bakes and cantilevers.
Though both are rim band brakes, there MUST be certain major variations that set them apart. And here is where the discussion arises.
Table of Contents
A. Cantilever Brakes Vs. V Brakes: Which One Is Better?
Time to dive right in and observe these two types of rim brakes from a more critical viewpoint. Both have numerous advantages, but the question is, which one has MORE benefits?
1. Are These Two Kinds of Brakes Interchangeable?
Yes, they are. But this should be your last resort.
These two are both categorized as rim brakes, after all. Hence, do not be surprised if they share several features in common, namely mounting bosses, operation, and straddle cable pulls.
1a. The Mounting Bosses
The brazed-on (or mounting brake bosses) are designed for V-brakes, cantilevers, and brake calipers, meaning you can install these mountings on any of these brakes without difficulties.
Rare exceptions probably only include brakes for vintage touring bikes introduced around the 80s, with narrow mounts and limited tire clearance tailored mostly for cantilevers. Hence, V-brakes can never fit them properly.
But now, thanks to the invention of mountain bikes, these bosses have become standardized. Sure, picky riders might still spot several small discrepancies between V-brake and cantilever brazed-on, but they do not have a considerable impact on their interchangeability.
1b. Mechanical Cable Travel Pulls
Most V-brakes and cantilevers are regarded as cable-actuated. Their hydraulic brakes are available, though they lag significantly behind in terms of popularity.
Some major advantages they offer over hydraulic rim brakes are:
- Great modulation
- Lightweight
- No excess hydraulic fluid
- Reduced power losses (thanks to the lack of complex compressionless brake housing flex and cable routing).
1c. Operations
The braking mechanisms of V-brakes and cantilevers are fairly similar. Both their levers pull cables to initiate small rotations on the arms, which grab the rims like how an average plier works.
After that, the pads will start to rub against the rims, slowing down your bicycle.
Once you release the lever, powerful springs will push the brake arms back to their initial placement, freeing the wheel completely.
2. Advantages Over Each Other
| Cantilevers | V-brakes |
| Free of water and mud | Mud and water might get stuck, especially on low-traction surfaces |
| Difficult adjustments | Easy adjustments |
| Vintage designs | Modern designs |
| Fork shuddering | No fork shuddering |
| Weak squeezing responsiveness | Strong squeezing responsiveness |
2a. Advantages Cantilevers Hold Over V Brakes
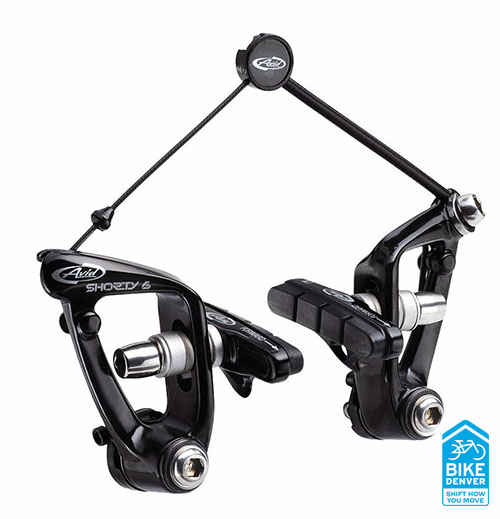
Despite thriving mostly on cheap or vintage bikes, cantilevers still sustain their current popularity due to their lightweight and decent performance.
Some experienced riders can already guess where this comparison is going, but hey, there is still one advantage that cantilevers hold over their V-brake rivals!
And that’s nothing other than the impressive clearance cantilevers foster between the wide tyre rims and the brake system – terrific for loose surfaces and muddy conditions. The mud will pass below the pads, flinging off in seconds without leaving any marks behind.
Meanwhile, mud often gets stuck on V brakes in wet conditions, making it much more challenging for you to pedal.
2b. Advantages V Brakes Hold Over Cantilevers
For fans of cantilevers, you might be disappointed; the anti-mud design above is probably the sole upside this vintage brake has over V brakes. On the other hand, we can list numerous benefits that make V brakes a superior option:
Adjusting their pads is much easier than on cantilevers
Most cantilever brakes incorporate two wires connecting the central point and the brake pad. One too-loose wire means adjusting these cantilevers can be a great pain in the ass. Meanwhile, V brakes are a different story, whose wires can get separately tightened with an effective braking device (ex: screwdrivers). That saves you quite a lot of time!
Another significant drawback of cantilevers is the diverse pad directions; getting the right angles and heights for them is definitely a frustrating experience. Say goodbye to such exhausting tasks as V-brake pads are often secured tightly, meaning they always stay in the spot and barely move an inch. Constant changes and tweaks are by no means necessary.
Some might argue, why bother to adjust these pads in the first place? Why can’t we just leave them there and proceed? That way, both types of brakes will be more or less the same.
See more: The 5 Different Types of Bike Brakes
The rule is to adjust the pads constantly to keep them well-functioning. For frequent riders who use the bikes every day, travel agents recommend a schedule of at least biweekly or monthly.
And for competitive, professional cyclists where timing matters, pad adjusting is more important than ever, giving you an upper hand over other rivals.
That’s why leaving the pads unchanged is simply out of the question – and the reason V brakes are clearly your best bet.
Their squeezing/usage is much more straightforward
Most people concur that they barely need to exert any force to squeeze V brakes. And that’s not a coincidence; such a feat is achieved thanks to V-brake’s innovative designs.
More specifically, their flexible spines allow you to lock out the rear wheels completely. Since the braking mechanism already plays a part in reducing the wheel’s speed, the rest of the job is much more seamless.
You only need to interfere a little to complete the bike’s stop. This advantage will become even more palpable for fast/downhill riders.
Even oversized individuals (those slightly heavier/bigger than average) will find such a mechanism incredible; gone are the days they had to produce excessive power to make the bike halt!
Lastly, this ability to squeeze immediately proves useful in densely-populated cities, where a vast majority of mishaps may occur without warnings: cars pulling out of nowhere, unseen obstacles and pedestrians, etc. The need to brake your bike immediately and avoid accidents is more important than ever.
With this reason alone, V brakes have already left cantilevers far behind in this intense competition. Of course, the market has far better options (ex: mechanical disc brakes or rear drum brakes), but between cantilevers and V brakes alone, the winner is obvious.
3. The Cons
Though V brakes clearly take the crown in this not-so-balanced competition, both still pose several downsides you should pay attention to.
V-brakes:
- Potential rim wears
- Affected easily by mud and water
- Regular shoe replacements are required
Cantilevers:
- Fork shuddering (violent vibrations in the fork when the cyclocross bike stops suddenly)
- Adjustments are difficult
- A bit old-fashioned/vintage designs (and more modern ones are super expensive since they are not that popular)
B. How to Convert These Brakes?
There are cases when you cannot afford a V-brake and want to convert traditional cantilever brakes into one. And although rarer, certain people also wish to change their V-brakes into cantilevers.
What to do, then? Refer to these guides for help:
1. Converting Cantilevers Into V-Brakes:
Step 1. Detach Your Old Road Levers
The first thing to do is to use a hex wrench (about 4mm) to pull off the cantilevers. After that, unscrew the bolts to remove your current brake. Repeat this for every side.
Step 2. Detach Your Brake Cable Hangers
First, detach the stem and pull it out. Next, use wrenches to loosen its lock nuts, sliding the hangers off. Once done, replace those hangers with spacers of approximately the same density. Put in the spacer and locknut, screwing them using your fingers.
Keep the top cups from turning using the cone wrench. At the same time, tighten the nuts with adjustable screwdrivers.
After that, reinstall the handlebars onto the stem. Remember to place it correctly before locking it down.
Step 3. Start Mounting The V Brake
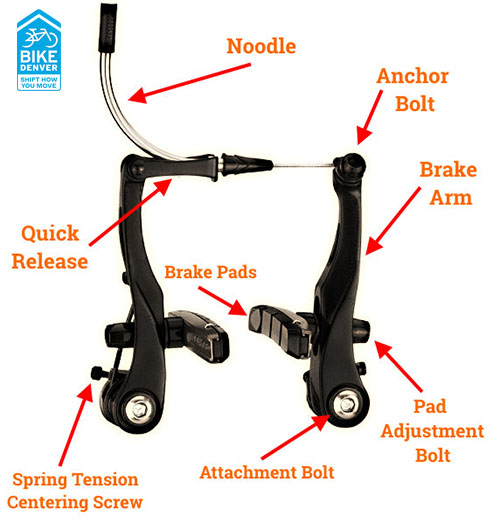
A V brake has two sides (left and right). The right side has clamps to attach the cables, while its left side offers protruding parts to catch on the noodles.
Locate the right side’s back and disengage the springs and the catch. Next, put the drag brakes into the posts, lining the hole and the tiny pins to re-engage the spring again.
Repeat that for the left side before using a wrench to re-screw the bolts onto the centre-pull brakes. Move to the front roller brake and perform this whole step one more time.
Step 4. Set Up The Levers On The Handlebars
For cross bikes with no brake levers, installing new ones suited to V brakes is a piece of cake. Otherwise, you have no choice but to remove everything – handlebars, transverse cables, shifters, and levers – since they can only work with cantilevers and not V brakes.
Step 5. Set Up The Grips
The best way to level your levers accurately is to install some new grips and coat their inside with alcohol. That way, the grips will slide in much more easily.
Once you have properly adjusted the lever positions, go ahead to tighten the bolts.
Step 6. Trim The Cable Housing for the Brakes
Now cut off the front brakes’ cable housings. Slide the noodles into the catches and test how they fit. Cut the excess parts when you feel certain.
Step 7. Flip The Barrel Adjusters and Slide The Cables Through The Levers
Turn the adjuster to align it with the slots, making it easy for the cable to pass through. After pulling the lever (to slip the cable through the slots), take one cable end and pull it into your lever’s notch.
When everything has settled in, turn the adjuster again and lock your cables firmly in place.
Step 8. Start Mounting The Cables and Check The Pressure
Position ferrules on the cable housings. Pass these cables through them carefully. When the inner and outer cable casings have been installed, test how they perform by pushing the lever 5 to 10 times. That way, you can identify the resistance level delivered by the wheel rims and rear brakes.
To avoid miscalculations, ensure the pads and the wheel contact when you pull. Brake company brands (ex: Harris Cyclery) also suggest adjusting the brake’s tension by loosening/tightening the screws on the brake’s sides till you feel satisfied with the results.
Step 9. Remove The Excess
Does the cable still need further trimming to make room for tension adjustments? Feel free to cut it using wire cutters.
One way to protect the trimmed ends from damage is to slide an end cap on them and squeeze it with pliers. Also, experienced bikers recommend leaving a space of approximately 3 inches to foster future modifications if needed.
2. Converting V-brakes to Cantilevers:
Since these cases are rarer (who wants to convert a better-performance brake into lower-quality ones?) the process is much more straightforward.
Step 1. Purchase bolt-on products to hang the seat stay and the fork.
Step 2. Buy cable hangers to wrap the cable around the headset’s steerer. Another option is to attach the hanger to the forks directly.
Step 3. Use an adaptor to attach the binder and seat post together.
C. Why Fixed Gear Road Bikes Never Install V Brakes
Compared to road bikes’ mechanisms, V brakes have too much squeezing power and too limited modulation. More contact patches are required to help riders maintain traction on bumpy surfaces and dirty conditions.
D. Can We Use WD40 On These Traditional Brakes?
100% yes. The only thing to note is that WD40 is an all-purpose product, meaning it’s not specially tailored for linear-pull brake lubrication. You might want some more niche solutions.
See more: Can You Use WD40 On A Bike Chain?
Conclusion
We hope you have grasped the core variations between a V brake and a cantilever brake. Though V-brakes show way more advantages, both these high-performance systems apply well to different types of bikes and can suit varied demands. Assess yours to decide on the more appropriate option!
Are you one of those currently using V-brakes and wanting to change them to cantilevers (or vice versa)? Then there’s no need to worry; We have provided comprehensive guidelines that even novices have no trouble following. Trace along with them carefully!