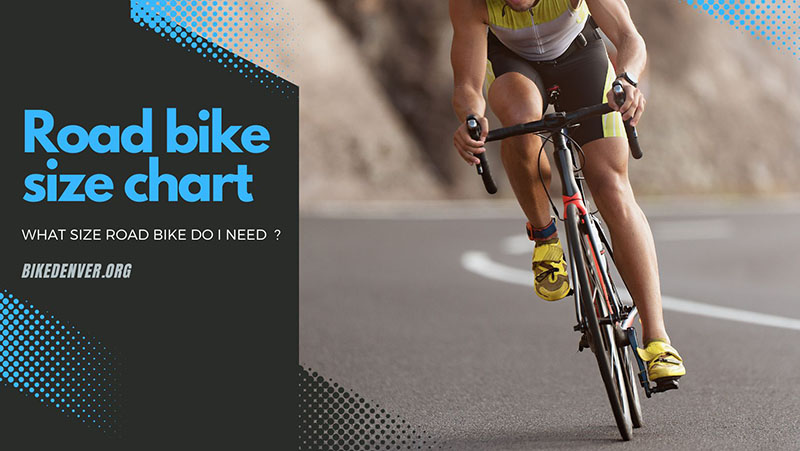
A well-fitted bicycle for your height and body figure promises a smooth and efficient ride. Especially when you pedal on the uneven surfaces of a steep climb, a suitable “horse” offers more control to show off your biking techniques and saves you from risks and dangers.
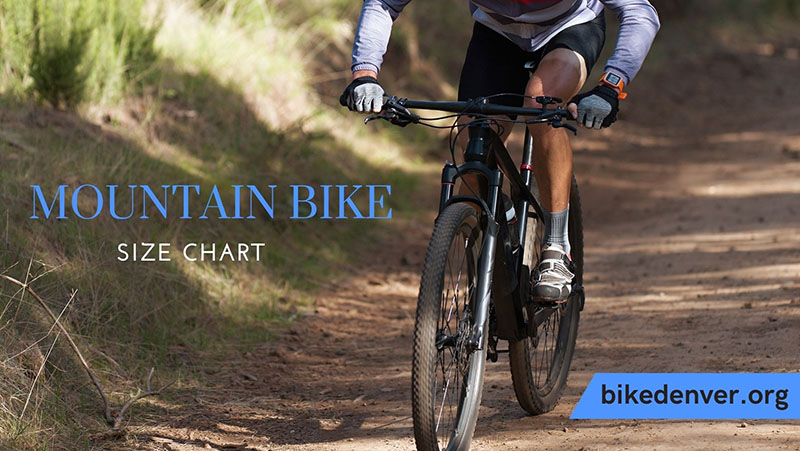
So which sizes of mountain bike suit you best? It is the most important decision you must make before shopping, and fortunately, the size chart for MTB below may come in handy.
Table of Contents
Mountain Bike Frame Size Chart By Height
Similar to clothing, the mountain bike market serves consumers various sizes from XS to XXL to fit like a glove for all preferences. Though there are many other ways of measurement, height and leg have a lot to do in size selection.
Mountain Bike Size For Men
| Height | Inside Leg | Recommend Size | ||
| Inch | cm | Inch | cm | |
| 4’10’’ – 5’0’’ | 147 – 152 | 26’’ | 66 | 13’’ (Extra small) |
| 5’0’’ – 5’3’’ | 152 – 160 | 27’’ | 69 | 13’’, 14’’ (Extra Small) |
| 5’3’’ – 5’7’’ | 160 – 170 | 28’’ | 71 | 15’’, 16’’ (Small) |
| 5’7’’ – 5’9’’ | 170 – 175 | 30’’ | 76 | 17’’, 18’’ (Medium) |
| 5’9’’ – 5’11’’ | 175 – 180 | 31’’ | 79 | 18’’, 19’’ (Medium, Large) |
| 5’11’’ – 6’2’’ | 180 – 188 | 32’’ | 81 | 19’’, 20’’ (Large) |
| 6’2’’ – 6’5’’ | 188 – 196 | 34’’ | 86 | 20’’, 21’’, 22’’ (Extra large) |
| >6’5’’ | >196 | 36’’ | 91 | 23’’, 24’’ (Extra extra large) |
Mountain Bike Size For Women
| Height | Inside Leg | Recommend Size | ||
| Inch | cm | inch | cm | |
| 4’10’’ – 5’1’’ | 147 – 155 | 26’’ | 66 | 13’’, 14’’ (Extra Small) |
| 5’1’’ – 5’3’’ | 155 – 160 | 27’’ | 69 | 13’’, 14’’ (Extra Small) |
| 5’3’’ – 5’5’’ | 160 – 165 | 28’’ | 71 | 15’’, 16’’ (Small) |
| 5’5’’ – 5’8’’ | 165 – 172 | 30’’ | 76 | 17’’, 18’’ (Medium) |
| >5’8’’ | >172 | 31’’ | 79 | 19’’ (Large) |
Mountain Bike For Kids: What To Consider

Choosing vehicles for young riders poses a lot of different principles than the ones for adults. Typically, size charts for kids’ mountain bikes are developed based on the wheel size (ranging between 12-26 inches) rather than the frame.
See more: How To Measure Bike Wheel Size?
Note that some well-developed children may fit adult sizes; you’d better look for extra small adult options for these teens. As a general rule, make sure your child on the pedals can put his feet on the ground for absolute safety.
It would help to put more attention on some other components. The important point is whether the kid can access the controller and works well with it. For example, it is a risky bet if the brakes are too stiff for small and weak hands.
We have encountered too many kids’ bicycles with too long cranks, which is a mistake. The improper design puts pressure on cycling posture and leaves muscle soreness and pain.
We also recommend the 1x drivetrain, which comes with a single chainring, a derailleur, and a cassette. Choosing the small gears and adjusting the right chain size according to your local terrain is essential.
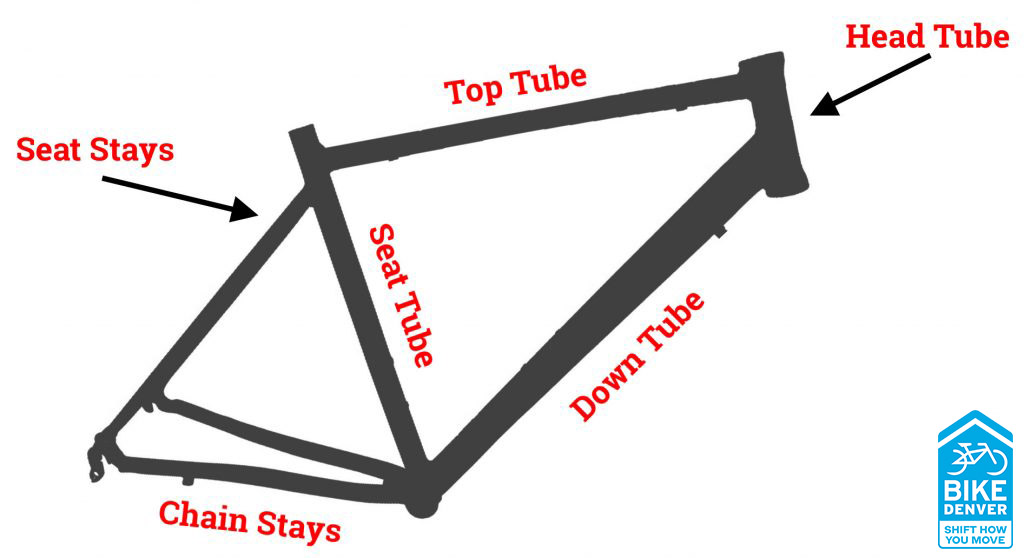
Mountain Bike Sizing: Choose By Bicycle Geometry
Important Geometry You Should Know
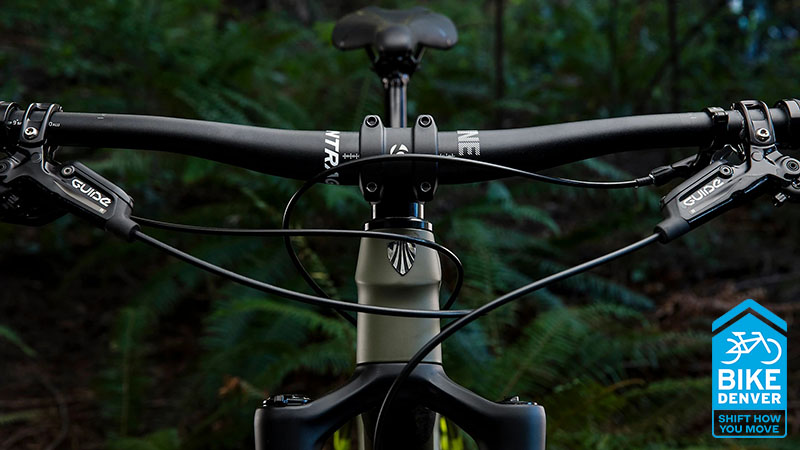
Geometry implies the shape of the bicycle, produced by important measurements. Knowing the basics allows you to use the information effectively to consider your needed MTB size. Look at the picture below and stay tuned for the anatomy of a bicycle.
Reach & Stack
These two basics are enough for comparing different bike models and deciding which one is right for you regardless of the manufacturer’s size mentioned.
The measurement of the stack comes vertically from the bottom bracket to the center of the head tube. When you’re at the pedals, this term refers to how tall the frame is in the ideal ready stance. For MTBs, the saddle tends to result in aggressive riding positions.
The reach measured from the bottom rack to the top of the head tube affects cockpit space and hip range of motion. Despite the close relation with the stack, the reach tends to outperform to match the main uses of mountain bikes.
Chainstay Length
This term represents the distance from the bottom bracket to the rear axle and affects the bike’s handling. A short chainstay lifts off the ground easily to create dynamism and agility. In turn, this setup requires sacrifice by the length of the wheelbase, thereby losing stability on rough surfaces.
Seat Tube Length
According to cycling standards, the seat tube length is equivalent to the distance from the center of the bottom bracket to the top of the seat tube.
Seat tube length determines the saddle’s height, influencing the accessible leg length of the rider. Once you adjust this length, the seat tube angle changes slightly between 71-75 degrees.
Top Tube Length
Also known as the effective top tube, this length points out the distance between the head tube junction to the seat tube. This parameter becomes useful when we miss the necessary information for stack and reach measurements. It is the best way to compare the sizes of brands in this case.
Bottom Bracket Height
This measurement starts at the center of the cranks and ends at the ground to show how low the bike’s center of gravity is. In theory, the low bottom rack allows the vehicle to take spectacular turns, but that is not the whole story. The mountain bikes run regularly on bumpy roads and surfer from many obstacles instead of paved roads.
Chances are your horse is entangled in roots, rocks, or pieces of wood. The wealth of experience prepares the pros to deal with this situation, but newbies may get off the road.
Wheelbase
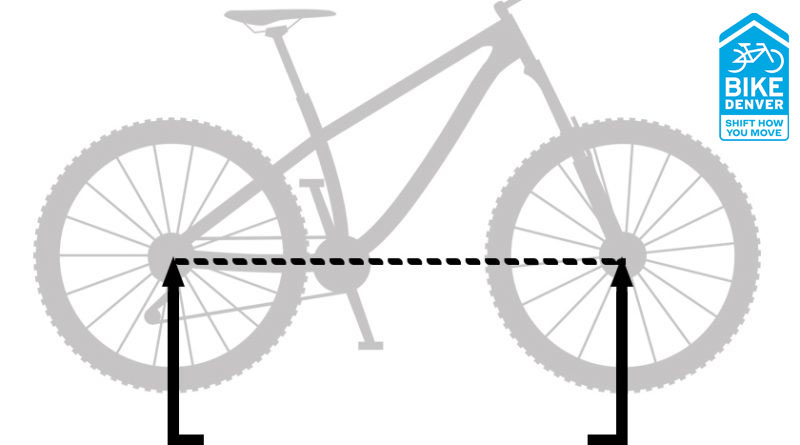
The wheelbase hints at the horizontal distance between the center of the front and rear dropouts. Almost all of the above concepts contribute to this length between the two ground contact points at the wheel.
The theory behind this parameter is the trade-off between mobility and stability. Bikes with short wheelbases often serve up sharp handling and control, while long ones streamline stabilizing and support comfort.
That’s why you will come across touring bikes with long wheelbases for more comfort on long rides and MTBs with short wheelbases for easy maneuver.
How To Size A Mountain Bike
When you sit on a bicycle, your body makes contact with it at three points: the bar, the pedals, and the saddle. The relative position of these parts close to the hands, feet, and back governs the vehicle’s fit.
However, there is more than one basic principle when you delve into bicycle geometry. And here’s what you need to know.
Seat tube length and standover height
Before going to the main point, you should get used to another new concept – “fixed height,” which indicates the space between your top tube and your pant leg. Still, the adjustment usually comes from the seat tube, which should leave some usable space to avoid painful consequences.
A general rule of thumb is to maintain a minimum of an inch between the top leg and crotch by stepping back as far as you can. Once you apply our tip, the seat post gets an ideal range of adjustments to find the right saddle height for you.
Saddle height and crank length
Most riders do not mind cranks in the 170-175mm range, but shorter cyclists find it a nightmare. When you have short legs, this length is too much for you to keep the movement of the knee right.
To properly use the muscles, pay attention to the saddle height (we’ve explained below). This action guarantees satisfaction in foot and knee movement throughout the pedal stroke.
Reach and top tube length
While each term delivers its own meaning, the combination provides a rough idea about the bicycle size and the riding experience, especially when descending.
The tests to find the right reach setting compromise controllability and comfort. Beginners should start with the MTB in an upright position, reducing the load on the wrists and arms. But avoid overstretching to protect your back. Once you get used to your “horse” and want to speed up, lengthen your reach through the top tube.
Seat angle
We recommend defining the seat tube at an angle from 70 to 75 degrees. In particular, angles from 70 to 73 degrees work best for cross-country MTBs, while riding uphill calls for an angle of the larger end – 72 to 74 degrees. This way, you feel complete control over the weight distribution.
However, novices seem to lean backward rather than contribute their weight evenly. Sliding (the seat) too far back reduces the force of the front of the bike and hinders the effectiveness of the suspension fork.
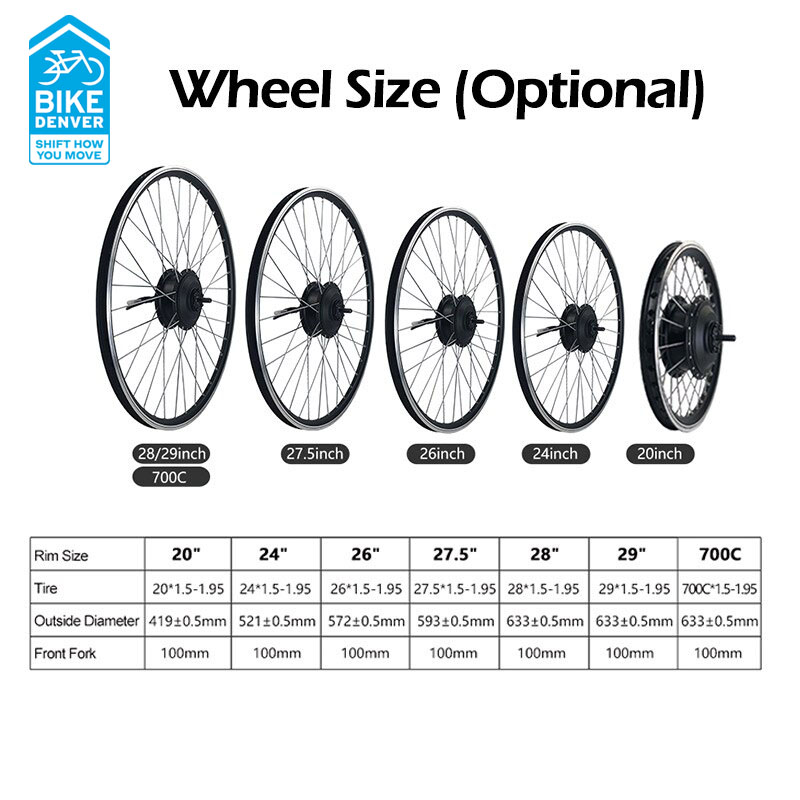
Choosing Your Bicycle By Wheel Size
Some brands use different wheels between the largest and smallest sizes. For example, large 29 and 27.5-inch wheels appear in most MTBs, but some extra small frames sometimes come up with 26-inch ones. Understanding the unique features of these options helps you get closer to the best bicycle.
The 26er
26″ was once a popular size for mountain bikes, but it’s now a thing of the past. This type of wheel is usually attached to vintage bicycles, which might be pulled from the bottom corner of the garage. So is it still useful? Well, maybe.
Nowadays, the 26-inch wheel works well for children’s bikes thanks to its small size. The compact and lightweight design allow fledgling riders to gain confidence and master their riding skills before moving on to adult vehicles.
Additionally, you can also find the 26er in dirt jumping. Adventure players achieve sweet landings due to short spokes and sturdy alloy rims that make the hub link less prone to distortion on impact.
The 27.5er
The nature behind the production of the 27.5″ comes from the best balance, and it really does. This option is a cross between 26″ and 29″, thus inheriting the best of both worlds.
Specifically, it boosts agility for a timely response on uneven terrain compared to larger wheels. At the same time, the increase in tire volume offers quite a bit better obstacle handling, thus putting an end to the 26er. Another plus is more comfort on mountain bikes, even when you move on gravel or rocky surfaces.
A flexible, agile, fun ride is guaranteed as long as the wheels do not roll with great intensity downhill.
The 29er
Despite the ongoing debate on the forums as to whether larger wheels produce better performance, the 29ers still find their way in pro racing by providing evident benefits of a larger diameter.
New technology has given cyclists a significant upgrade in the stiffness, strength, and stability of the wheels. The 29-inch wheel takes longer to accelerate than its cousins, but in return, it maintains a lightning speed throughout the process. Even if it hits tree roots or rocks, it barely slows down, thanks to the shallow impact angle.
Besides, the larger contact plate allows the 29er to produce better clutter keeping you safe on the trails. The big spin is meant for more traction to get over the slopes with less power.
On the downside, the bulky design causes the 29″ to lose its agility in tight turns. Your control and response suffer from lag once the wind gets under the wheel.
Sizing Up Or Down: Which Suits You Best?
By now, chances are you have the right height size according to our guidelines. But if you are at the edge or between sizes, what should you do?
What Does Sizing Up Give You?
Go up a size if you prioritize stability and have gained years of experience. This action equals a transition from a small to large reach. As a result, the biker gets a low range of motion in the cockpit, which creates more space for movement.
Besides that, the wheelbase also expands, leaving an odd feeling that the bike is a bit longer. This setup is ideal for tall riders who seek a perfect fit. Furthermore, it allows you to experiment with more aggressive riding positions to overcome terrain instead of gliding through.
On the downsides, keep an eye out for pitfalls. Only those long-in torsos or endurance yoga practitioners can conquer the long range of motion at the hips when the wheels are further apart. You also have to trade agility on technical distances for stability at high speeds.
What To Look For On Sizing Down?
Conversely, dropping down one size gives you a shorter wheelbase and reach. These features are suitable for those who fall for speed or comfort.
The small frame size makes the standover height low and the handlebars close to the saddle, which corrects the rider to an upright position. If you have longer-than-average legs or are less flexible, you can expect a more comfortable ride than the options as standard.
While the longer cockpit results in an aggressive stance, the short wheelbase supports maneuverability and a fast pace. You may need to extend your seat-post to get to your cycling position, but this is a minor consideration when you are between sizes.
Adjusting Your Bicycle For Best Fit
Saddle Height
Whether you achieve efficiency on the pedal is the most important thing for fit. For this reason, tweaking the saddle to its correct level should receive close attention during the demo ride.
One piece of advice we have received from professional riders is to estimate the saddle height from the top of the saddle to the center top of the pedal using the following formula:
Maximum saddle height = Trouser leg measurement + 5 inches (or 13cm)
For a spot test, set the crank straight up/down and sit on the bicycle in an upright position. Saddle height is perfect when your legs are straight, and your heel touches the pedals. Once you have to lean over to perform this action, the saddle is not installed within reach.
When you pose the ready stance, let’s take a final check. Of note, your knees should be slightly bent; otherwise, you will swing your hips while cycling.
Saddle Position
In theory, a bike should have saddle rails in the dead center and a flat saddle for precise reach. However, adjusting the saddle is necessary to match the riding style corresponding to your torso.
Someone who loves to conquer dangerous technical stunts or tricks prefers leaning backward, meaning that the saddle nose should be raised a bit (so-called tipped-back saddles). In the meantime, when the saddle nose is slightly lower than the back, it supports riders in climbing; or else, that rider just follows a leaning-forward posture.
It is best to adjust from the top high and itch little by little. Leaning too much forward or backward puts a strain on your vehicle.
Handlebar Height
How far away should the handlebars stay from the saddle? Heaven is in your goal. Some cross-country riders go for a low position (lower than the seat) for comfort on long rides, while most casual cyclists keep them equal to the saddle height.
Body weight distribution and arm length determine the setup process. Don’t hesitate to experiment with different postures to find the best one. So how do you know you’re right? Apply our finger rule.
Touch your elbow to the nose of the saddle and estimate the reach of the longest finger. There is nothing more effective on trails than a precise finger-to-point distance between the top of the handlebar tube and the center of the handlebar.
From this point of balance, you should combine with your typical riding style and adjust two parts: handlebars and seat, to find the ideal solution.
Control Position
Some of you practice putting your thumbs on the gear lever to control your bike’s speed, but you really do not have to endure pain in your hands for this purpose. We recommend adjusting this unit to within half an inch, and handling is easier than ever.
Feel free to change the contact point between the brake and the brake pad so that it is within reach of your fingers
The good news is that customers can customize the width of the handlebars. Only cutting an inch off one end of the handlebar can boost your comfort significantly. However, the wide bars offer better control. There is no right or wrong but your priority.
Pedals & Cleats
The pedal deserves more attention as a touch point between your body and the bike. We recommend the two best choices for this unit: flat and clipless. But the second option requires cleats below the ball of your foot for proper navigation.
The pads should match the natural foot angle and stay away from the cranks. It’s best to tweak it back and forth to see which muscle changes are most effective. This process may take a few demos, but the pedals run smoothly when you reach the right point.
FAQs
How Can You Measure Yourself For MTB?
Estimating yourself is a piece of cake, but few people know how to get their seam measurements. Here is how we did it by ourselves at home:
- Prepare a large hardcover book, a pencil, and a measuring tape.
- Put on your cycling shoes and stand with your back to the wall.
- Flip the book’s spine up and place it between your legs, so it touches your crotch.
- Mark a point where the spine touches the wall.
- Use the tape to measure from the mark to the floor. The obtained length is your inseam.
Why Is Bike Fit Important?
While a piece of clothing that is too big or small only leaves discomfort, an ill-fitting bike interferes with your experience and, at worst, causes injury.
Muscle aches may be caused by strenuous or wrong exercise, but when these symptoms turn into pains in the knees, back, arms, shoulders, and hips, they speak for the wrong size chosen.
How Can I Tell If My Bike Is Too Big For Me?

Bicycle geometry is an important but complex concept to apply wherever you go. Sometimes, you don’t have enough time and tools to consider whether a new vehicle will become a reliable companion for the upcoming climbing trip.
Several similar situations have happened to us, and we have found the answer with some of the following signs:
- Your feet cannot reach the pedals
- The front wheel lacks a grip
- You struggle to make your way through tough turns
- You tend to use a lot of energy to control
- You feel discomfort or pain with your normal cycling posture.
Conclusion
What size mountain bike do I need? The best choice depends on your height and feet length as the size chart at the beginning. Though some people prefer a larger frame for the upright posture, we still recommend following the manufacturer’s guidelines.
On twisty mountain roads, a quick response will always come out on top. If you still feel confused after reading all the information, do not hesitate to visit the bike shop for an on-site fitting or test ride and consult professional sellers.